Step 1. Log in your domain.com account and go to "Zone Record".
အဆင့္ ၁. မိမိ ဒိုမိန္းထဲသို႔ ၀င္ၿပီး Zone Record ကိုသြားပါ.
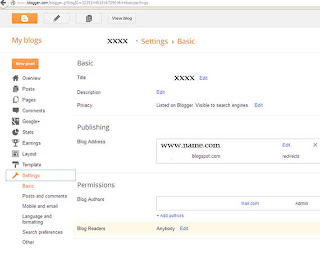
Step 2. Log in your blogger account , click your blog and click the "Settings".
အဆင့္၂. Blogger ထဲသို႔၀င္ၿပီး မိမိအေကာင့္ကို ဖြင့္ကာ Setting ထဲသို႔၀င္ပါ..
Step 3. Click the "Add a custom domain" link.
အဆင့္(၃). Add a custom domain ကိုႏွိပ္ပါ..
Step 4. Click "Switch to Advanced Setting" link.
အဆင့္ (၄). Switch to Advanced Setting ကိုႏွိပ္ပါ..
Step 5. Type your domain name 'www.example.com' ('www' is required). If you find the error, please follow the settings instructions.
အဆင့္ (၅). မိမိ ဒိုမိန္းအား ရိုက္ထည့္ပါ.. www. မပါမျဖစ္ထည့္ရမည္.. Error တက္လာမည္ျဖစ္သည္.. ျပထားေသာအဆင့္အတိုင္း လိုက္သြားပါ...
Step 6. Back to domain and paste the first values as below and click ' setup'
အဆင့္ (၆). domain သို႔ျပန္သြားၿပီး ေအာက္တြင္ျပထားသည့္အတိုင္း ရိုက္ထည့္ေပးရပါမည္။ ၿပီးေနာက္ Setup ကိုႏွိပ္ရပါမည္.
Step 7. Paste the second values as below and click 'setup'
အဆင့္ (၇). အဆင့္ ၅ ပံု (၃) တြင္ျပထားခဲ့သည့္ အနီေရာင္၀ိုင္းျပထားေသာ value ႏွစ္ခုရွိ ၂ ေဘးရွိ value အတိုင္း copy ကူးၿပီး ေအာက္ပါအတိုင္း ခ်ထားလိုက္ပါ..
Step 8. Back to blogger and click the "Save" again.
အဆင့္(၈). Blogger သို႔ျပန္သြားၿပီး Save ကို ထပ္မံႏွိပ္လိုက္ပါ.
Step 9. Finally it finished.
အဆင့္ (၉).ေနာက္ဆံုးေတာ့ ၿပီးဆံုးေအာင္ျမင္သြားပါၿပီ...

လမ္းျပႀကယ္ပရဟိတအဖြဲ႕ သို႕လာေရာက္သူအေပါင္းကိုယ္စိတ္ႏွစ္ျဖာ က်န္းမာလို႕ ခ်မ္းသာၾကပါေစ...
Credit by >>> ေမာင္ေပါက္


No comments:
Post a Comment